Step-by-Step Guide to Waterproofing Interiors
Why Interior Waterproofing Matters
Water ingress inside homes causes paint failure, mould growth, damaged finishes, and long-term structural decay. Interior waterproofing protects living spaces from hidden leaks, rising damp, plaster damage, and health risks associated with moisture. This step-by-step guide lays out a practical, professional approach to waterproofing interiors so you can plan, budget, and execute repairs correctly.
Step 1: Diagnose the Source of Moisture
Before any repair, identify why walls or ceilings are damp. Common causes include leaking plumbing, failed external waterproofing, rising damp, condensation, or roof/terrace seepage.
- Perform a visual survey for stains, efflorescence, and paint blistering.
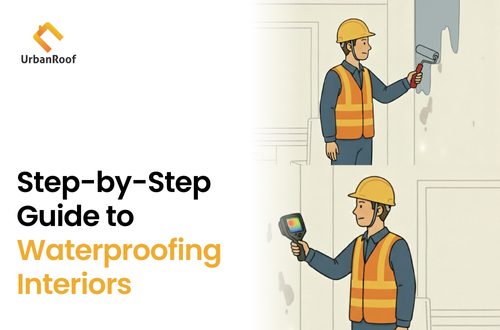
- Use moisture meters and infrared thermal scans to map damp zones.
- Trace plumbing lines and test suspected pipes for slow leaks.
- Check external elements such as terrace drains, parapets, and downpipes.
Step 2: Stop the Water Entry
Once you locate the source, stop active water ingress. The method depends on cause:
- Plumbing leaks: Repair or replace faulty pipes, joints, or fixtures immediately.
- Terrace or roof seepage: Fix external waterproofing, drainage, and slope issues first.
- Rising damp: Install or repair a damp-proof course (DPC) or use chemical DPC injection where appropriate.
- Condensation: Improve ventilation, add exhaust fans, and address thermal bridges.
Step 3: Prepare the Surface Correctly
Surface preparation is the backbone of any durable waterproofing system. Proper cleaning and repair ensure the new system bonds well.
- Remove loose paint, powdery plaster, and efflorescence using a wire brush and water wash.
- Cut out soft or damaged plaster and replace with suitable cement or polymer-modified plaster.
- Allow repaired areas to cure fully before applying primers or waterproof coatings.
- Ensure surfaces are structurally sound and free of salts; perform salt testing if necessary.
Step 4: Choose the Right Interior Waterproofing System
Selecting the correct system depends on the issue, substrate, and exposure. Common interior solutions include:
- Cementitious Waterproof Coatings: Easy to apply and ideal for wet areas like bathrooms and basements when substrate is stable.
- Polyurethane (PU) Coatings: Flexible and good for minor movement-prone areas; used sparingly indoors where specified.
- Crystalline Waterproofing: Penetrating systems that block capillaries in concrete and masonry, useful for rising damp and basements.
- Surface Sealers & Water-Repellent Coatings: For prevention on rendered walls; reduce absorption but do not fix active leaks.
Consult a professional to pick a system that matches substrate, movement, and expected exposure.
Step 5: Reinforce Joints, Corners, and Penetrations
Cracks, joint lines, and pipe penetrations demand special attention. Reinforcement prevents future delamination and leak paths.
- Use fabric or mesh reinforcement embedded in the first coat at corners and junctions.
- Seal around plumbing sleeves and electrical conduits with flexible sealants.
- Install movement joints where long runs of plaster meet different materials.
Step 6: Apply Waterproofing System as Per Manufacturer Guidelines
Follow product technical data sheets strictly—coverage, number of coats, curing time, and application temperature matter.
- Apply a suitable primer where required for better adhesion.
- Layer the waterproofing system in recommended coats with proper drying between coats.
- Ensure uniform thickness; use tools recommended by the manufacturer for even application.
Step 7: Perform Leak Tests and Quality Checks
Quality verification is essential before closing up finishes.
- Flood testing: For floors and wet areas, perform controlled water ponding to check for leaks.
- Moisture readings: Use moisture meters to ensure substrates are within acceptable humidity limits before plastering or painting.
- Adhesion tests: Check coating adhesion where necessary, especially on repaired areas.
Step 8: Restore Finishes and Use Appropriate Materials
After successful waterproofing and testing, restore interior finishes with materials that tolerate moisture cycles and provide durability.
- Use cement-based or polymer-modified plaster layers where recommended.
- Apply anti-fungal primers and breathable paints on top of cured waterproofing.
- Choose moisture-resistant skirtings, adhesives, and sealants in wet areas.
Step 9: Implement Maintenance and Monitoring
Waterproofing is a system, not a one-time fix. Schedule periodic checks to catch early signs of failure.
- Inspect internal damp-prone areas every 6–12 months.
- Monitor external drains, terraces, and plumbing lines regularly.
- Recoat protective layers as recommended by product manufacturers.
Common Mistakes to Avoid
- Applying coatings over wet or unsound plaster.
- Ignoring plumbing as a source and treating walls only cosmetically.
- Using low-grade materials or skipping reinforcement at joints.
- Skipping flood tests and relying solely on visual inspection.
When to Call Professionals
Call a qualified waterproofing contractor or structural consultant when:
- Moisture maps show extensive or recurring damp zones.
- There are signs of structural distress or large cracks.
- Rising damp or groundwater seepage is suspected.
- Repeated failures have occurred despite repairs.
Final Thoughts
Effective interior waterproofing protects health, aesthetics, and structural value. The right approach begins with accurate diagnosis, followed by source elimination, correct surface preparation, a suitable waterproofing system, and rigorous testing. With planned maintenance, interior waterproofing delivers long-term peace of mind and avoids recurring repair costs.